You cannot control light, but you can control its photographic effects
Light is the essence of photography. The amount of light that the camera’s sensor gets exposed to and the duration of the exposure determine the success or failure of your shot. Every basic photography course will cover light photography and teach you to look beyond the scene itself, to the lighting, to how you are positioned with relation to it, and how to add or reduce the amount of light that enters your lens.
It is relatively easy to understand the influence of light on photography. Your photos will improve as soon as you start recognizing this influence.

Light photography: the direction of light and its impact on photos
Even without photography lessons we quickly learn that when the sun is right behind our adorable daughter, our picture is not going to come out looking great (unless what you were going for is a dark silhouette of your daughter over a bright background).
When you’re taking a photo, always check the position of:
- Yourself (the photographer)
- The object(s)
- The main light sources (the sun, flash, other lighting)
To understand light photography you need to understand what are the effects of the position of light source relative to the photographer and objects.
Front Light photography
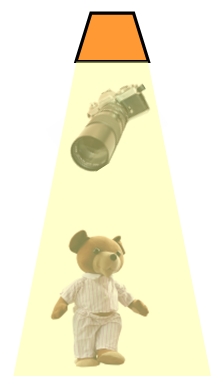 A front light is aligned with the camera and comes from behind it. Front light has the effect of flattening the image since it floods your object with light and doesn’t add any depth or shadows, except for shadows that occur right behind the object.
 Your flash may cause objects to be very bright, but may also bring out nicer shadows behind your object. If you want to get softer light with a flash you should use a wall or the ceiling as reflectors.
Back light photography
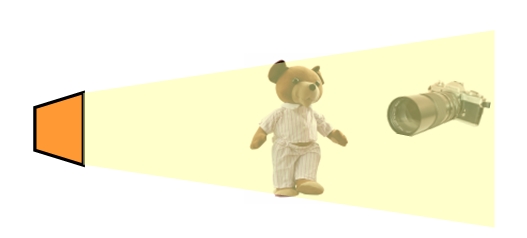 A back light comes from right behind your object. The main disadvantage with this set up is that it can cause lens flare and your photos will be washed out. Furthermore, your object might come out dark and look like a silhouette even if you try to compensate for this with the aperture and shutter speed.
 On the other hand, you can create a halo effect when shooting with back lighting since the object gets lit up from behind. Through the use of exposure compensation (adding flash, for example) we can brighten up the backdrop and light up our object so that neither comes out dark.
When you are taking a photo of someone in front of a sunset you should remember that without a supplemental light source this is going to be a back-lit photo. You should consider adding flash that won’t ruin the beauty of the sunset but will sufficiently light your object (don’t worry – even the strongest flash on the market won’t project all the way to the sun).
Side light photography at a 45-degree angle
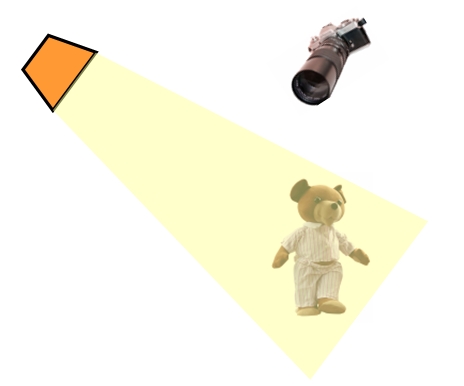 Light coming at a 45-degree angle is considered good for photography since it lights up objects very well. It creates some shadows that give a sense of texture, but without causing very deep shadows or flattening of the natural contrasts in the photo.
You can achieve side light with your flash aimed at a wall on another type of reflector, and through the use of reflecting light.
Side light photography at a 90-degree angle

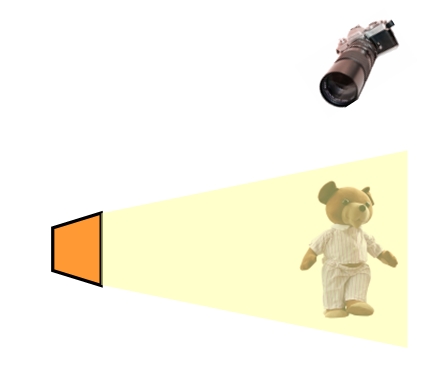 This kind of photography lighting is dramatic and creates strong shadows where one side of the object is lit and the other side is dark. The dark side of the object often becomes the focal point of the photo, as it has a more dominant presence than the lit side.
In the photo above, the shadows created by the pebbles were achieved with light coming at a 90-degree angle. It’s the shadow that creates the photo’s uniqueness and appeal.
Light photography: light sensors and auto-focus
Most modern cameras have a light sensor that matches the appropriate exposure to the amount of light that it receives at and around the object of the shot.
Though the results are usually good, we sometimes want to control the light intensity in a photo and not let the sensor call the shots. For example, you might want to do this when you’re photographing a sunset and you want to have it relatively dark or when you want to darken an object whose background is lit up (the sensor will set the aperture and shutter speeds that will leave the object dark).
An easy way to use the light sensor but still have some control over it is to point the auto-focus at your object. Here’s how: if you are shooting a person with a very bright background, focus on his face while zoomed in and then zoom out to snap the picture. The light sensor will set the parameters based on your object’s face and not based on the bright background.

The focus was done differently in each of the photos above. In the left photo we focused on the sign, which left the rest of the photo too dark. In the right photo we focused on the background, and the sign came out too bright (the exposure compensation was more harmful than good). In the middle photo we found a balance between the amount of light on the sign and on the background by focusing on the sign, and using exposure compensation to make the background brighter. It is the only photo of the three where you can see both the lions and the writing.
Light photography: what time of day has the best light?
It’s clear (clear as day) that there isn’t a definite answer to this question. However, many photographers prefer the light right after sunrise or just before sunset. This is because the light comes at a low angle, and it travels the longest way to Earth (as opposed to high noon where the sun is right above us and the light is very harsh). In essence, the Earth’s atmosphere acts like a sieve for light waves letting the longer wavelengths (softer light) in.
Since most of us don’t like to wake up with the break of dawn, and since the light at around sunset is also warm (with red and orange hues), many photography courses recommend shooting at that time. Portraits and landscapes come out looking softer and warmer. We don’t think you want all your shots soft and warm, so explore your scenes at different times of the day to choose the mood and light that works best for you.